[Part 3] Connecting the First Database to QueryPie ACP — What Changes for Developers?
November 7, 2026
In Part 2, I installed QueryPie ACP Community Edition on my Mac and signed in. Now I want to connect a database and query test data.
What interested me was the developer experience. Once an administrator registers a database, where does a developer run SQL? Is access limited to the browser, or can an existing database client be used?
I created a test orders database and queried it in QueryPie’s web interface. Then I tried entering proxy details directly in DBeaver and connecting through Multi Agent installed on my computer. All three methods returned the same five orders.
The versions used were QueryPie ACP Community 11.6.7 and MySQL 8.0.42. All customers and orders shown below are fictional lab data.
1. Connecting a Database and Querying It
First, I started another MySQL container, separate from QueryPie’s internal database.
I named the database orders_demo and inserted four customers into customers and 12 orders into orders. Looking up pending orders and counting by status would be sufficient to test connectivity and querying.
In MySQL, I created orders_reader with SELECT permission only on orders_demo. As this exercise only involves queries, the database account gets only that privilege. This is separate from the QueryPie user privileges configured later.
With preparation complete, I registered the database as an administrator and then connected as a developer.
2. Registering MySQL in QueryPie
After signing in as an administrator, I created a MySQL connection under Databases → Connection Management → DB Connections with the following values.
Connection name: Orders Demo MySQL
Database type: MySQL
Host / Port: orders-db / 3306
Database Name: orders_demo
Database account: orders_reader
For Host, I used orders-db rather than localhost. QueryPie and MySQL share a Docker network, so the container name is reachable. Here, localhost would refer to the QueryPie container itself.
This should be checked first when connecting a company database too. What matters is whether the QueryPie server can reach it, rather than whether my own PC can.
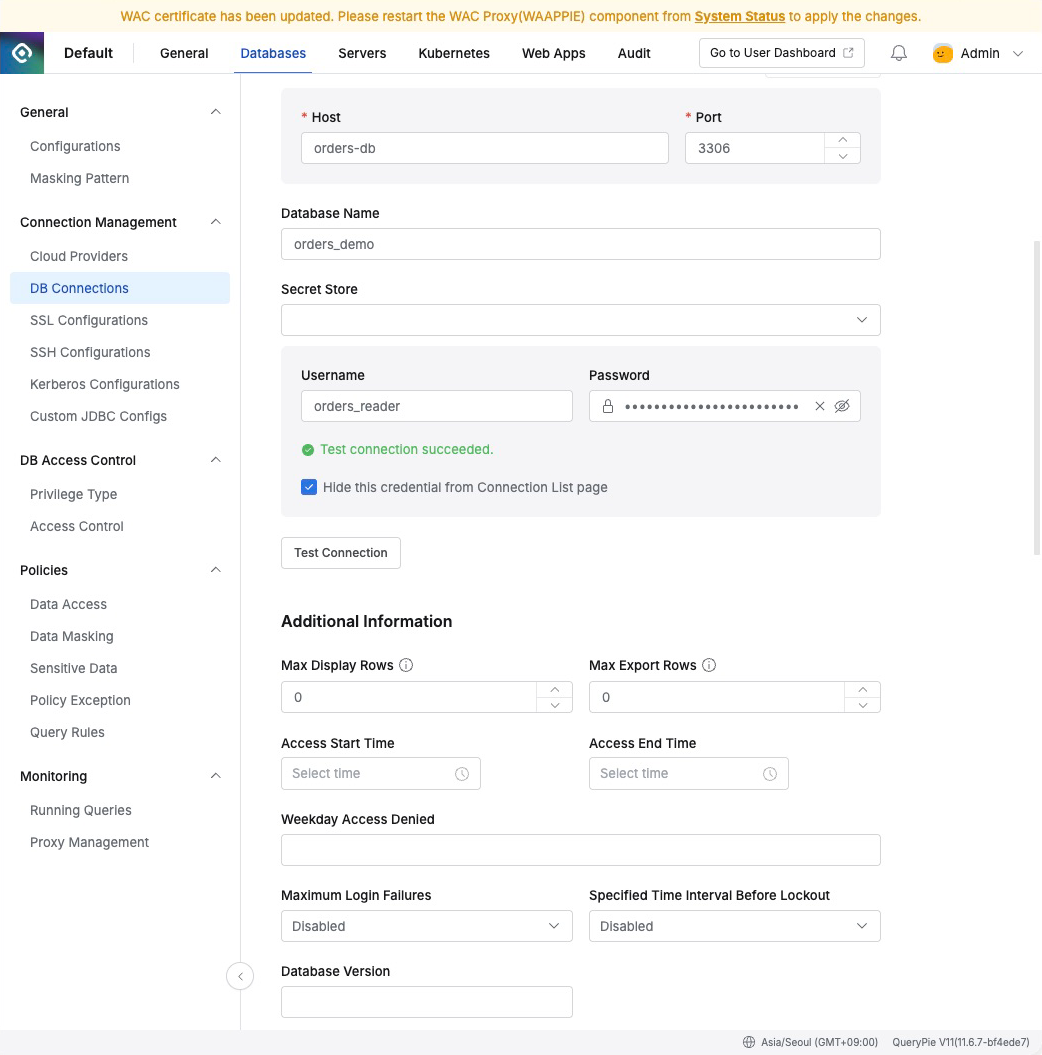
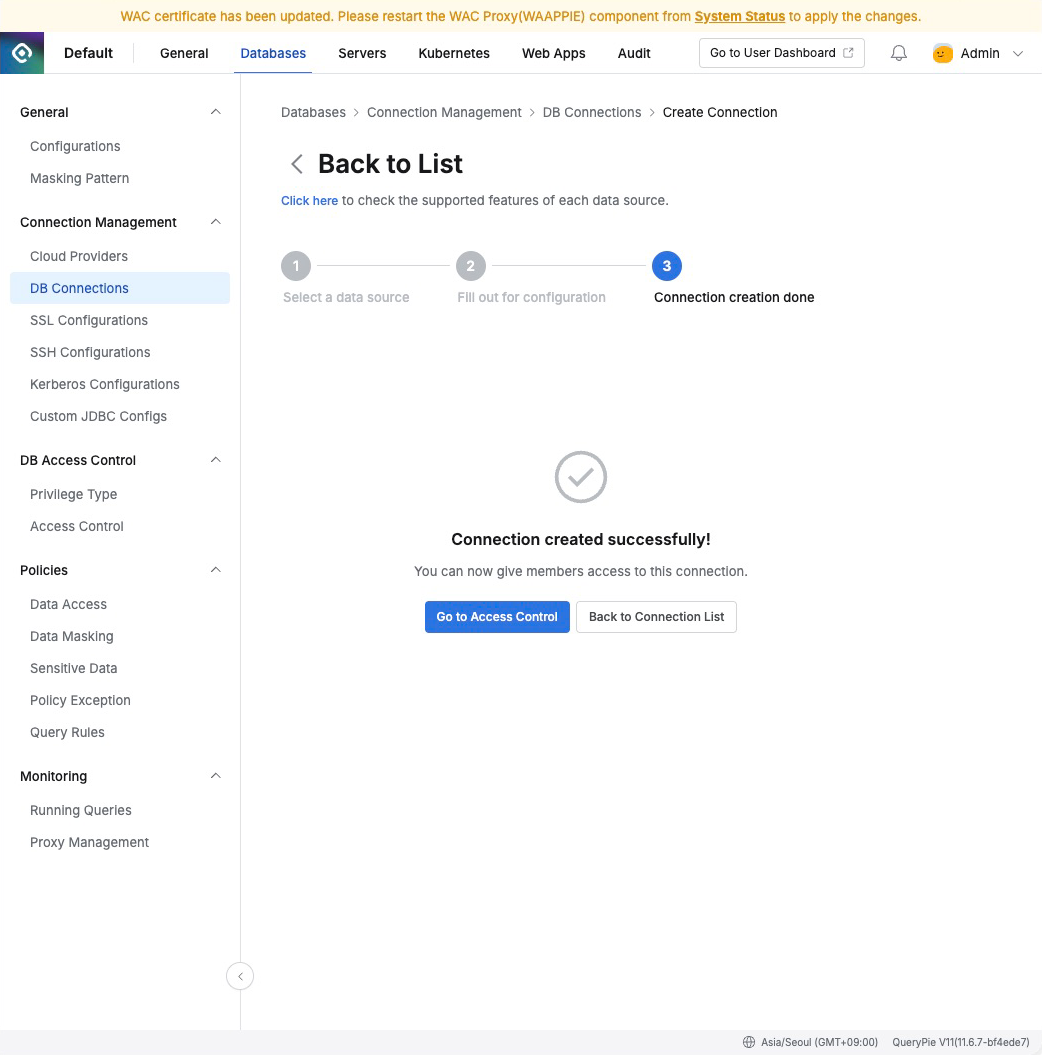
I entered the database account and password, clicked Test Connection, confirmed success, and saved.
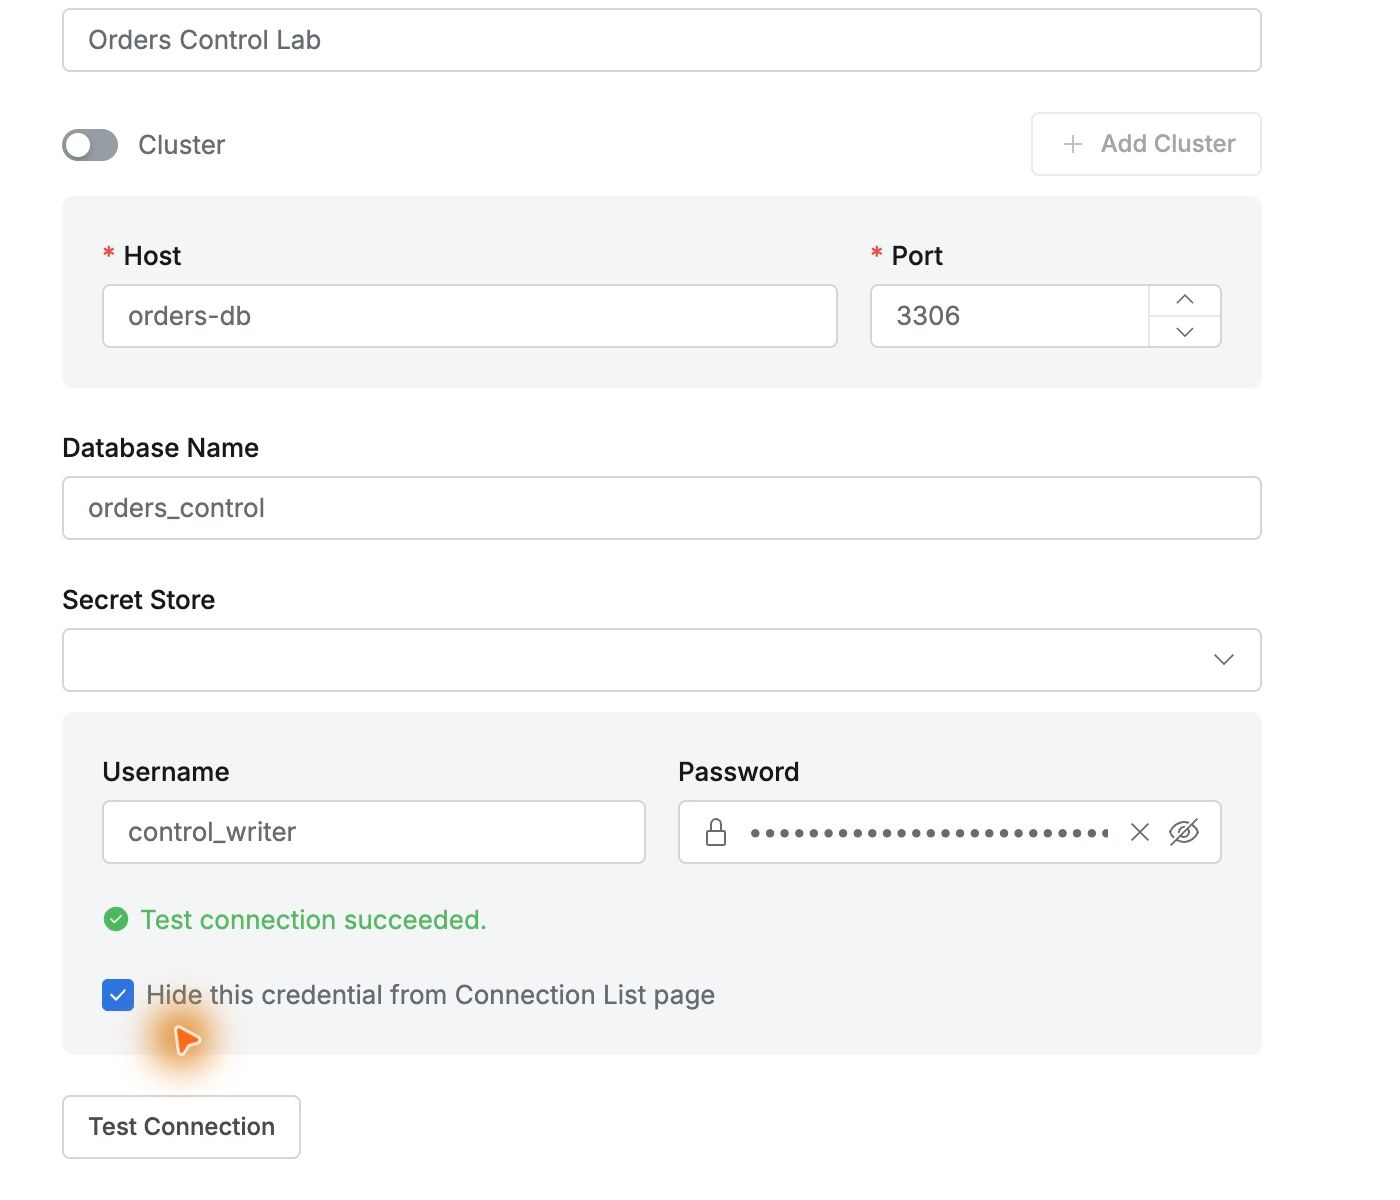
I also checked Hide this credential from Connection List page to hide the source database credentials from users’ connection lists. I would check how the password appeared after signing in as the developer.
3. Giving the Developer Read-Only Access
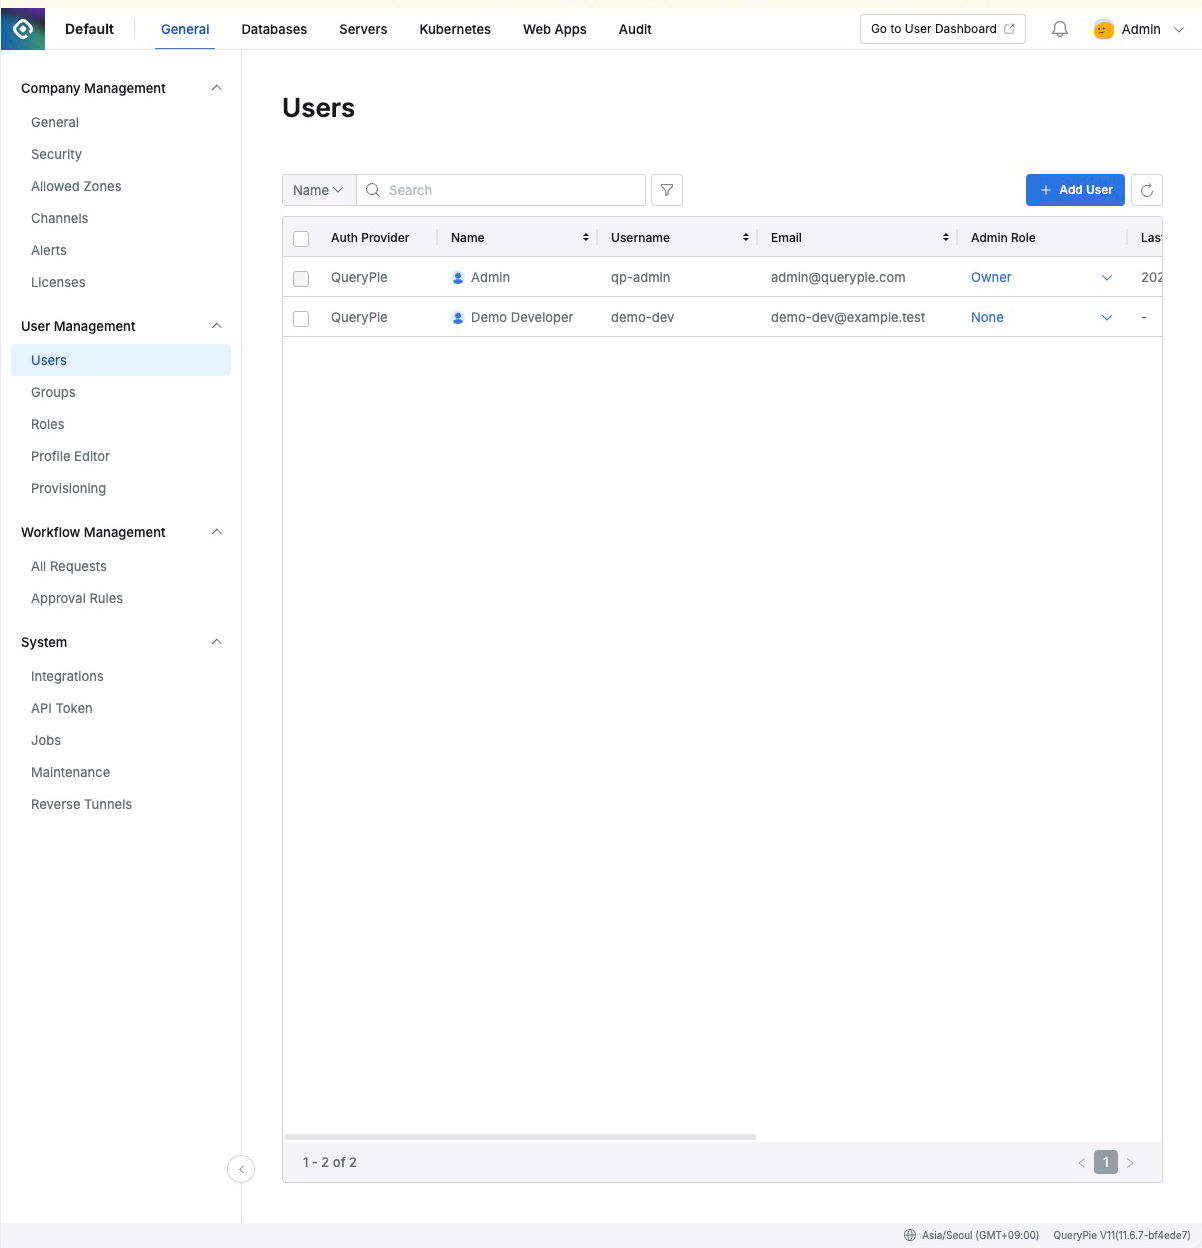
Testing only as an administrator can miss what developers actually see. Under General → User Management → Users, I created Demo Developer with login ID demo-dev and administrator role None.
I then opened Databases → DB Access Control → Access Control, selected Demo Developer, and used Grant Privilege to grant Read-Only access to Orders Demo MySQL.
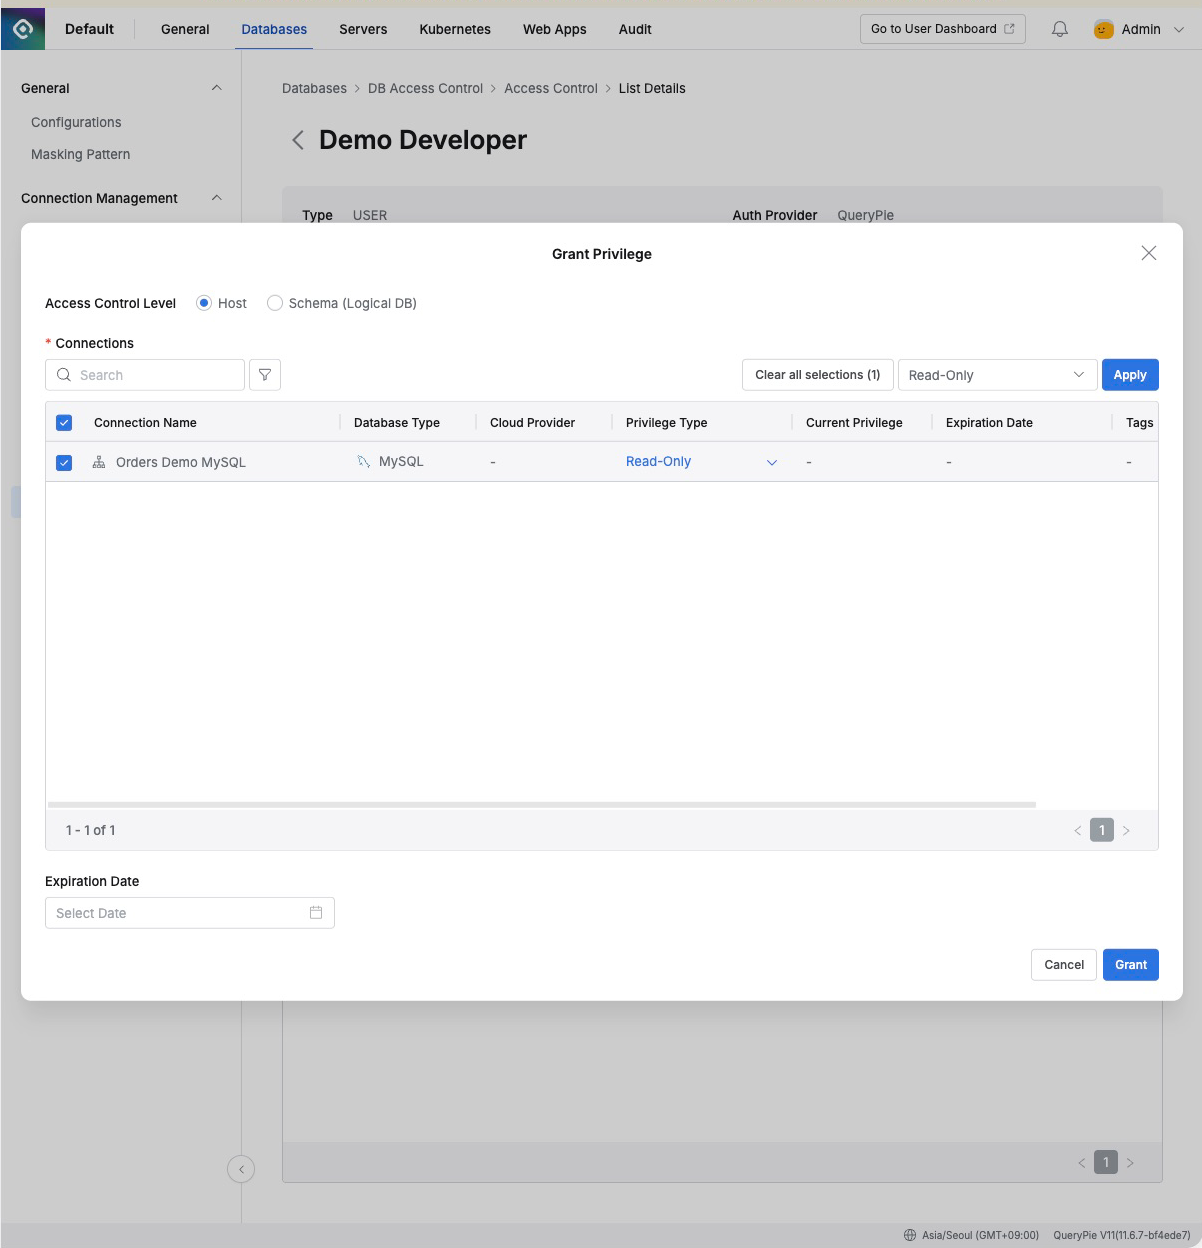
Registering a database and granting users access were separate steps. I granted a single user directly here; team groups would likely be easier at scale. Expiration dates are also worth considering for temporary access.
4. Signing In as the Developer and Querying Orders
I signed in as demo-dev and changed the password as required at first login. Expanding QueryPie Connections under Databases displayed Orders Demo MySQL.
Selecting it showed Read-Only (User), Select permission, and Active status. The developer had not needed to enter the original MySQL password.
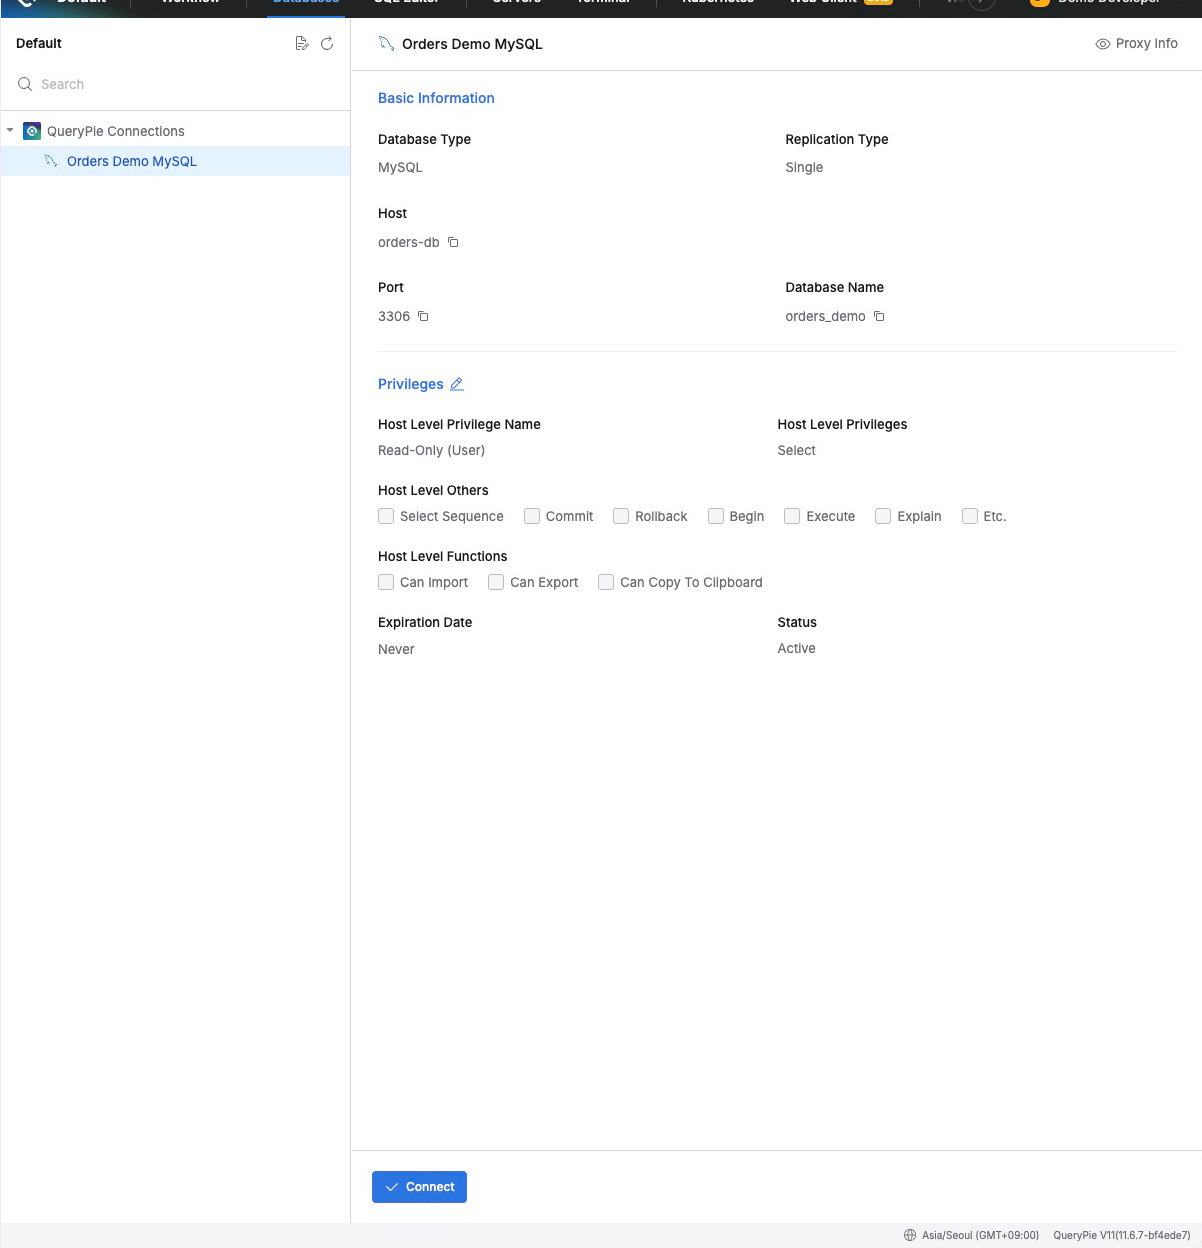
Connect opened the web SQL editor. I queried pending orders in orders_demo.
SELECT order_id, customer_id, order_date, status, total_amountFROM ordersWHERE status = 'PENDING'ORDER BY order_date, order_idLIMIT 20;
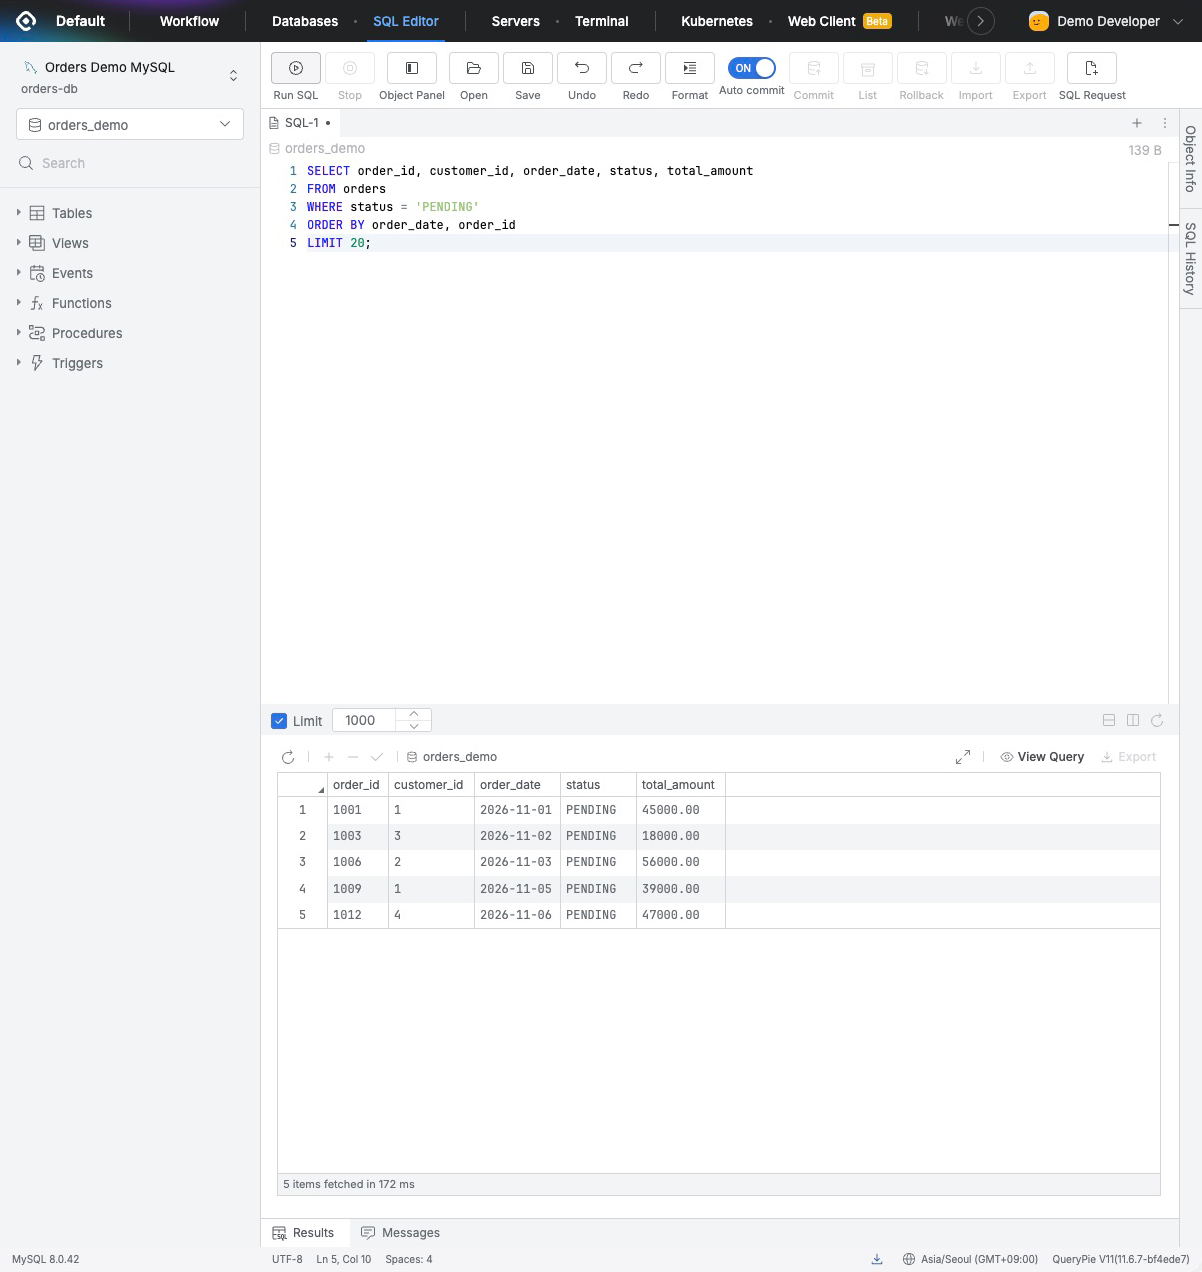
After confirming the list, I counted orders by status.
SELECT status, COUNT(*) AS order_countFROM ordersGROUP BY statusORDER BY status;
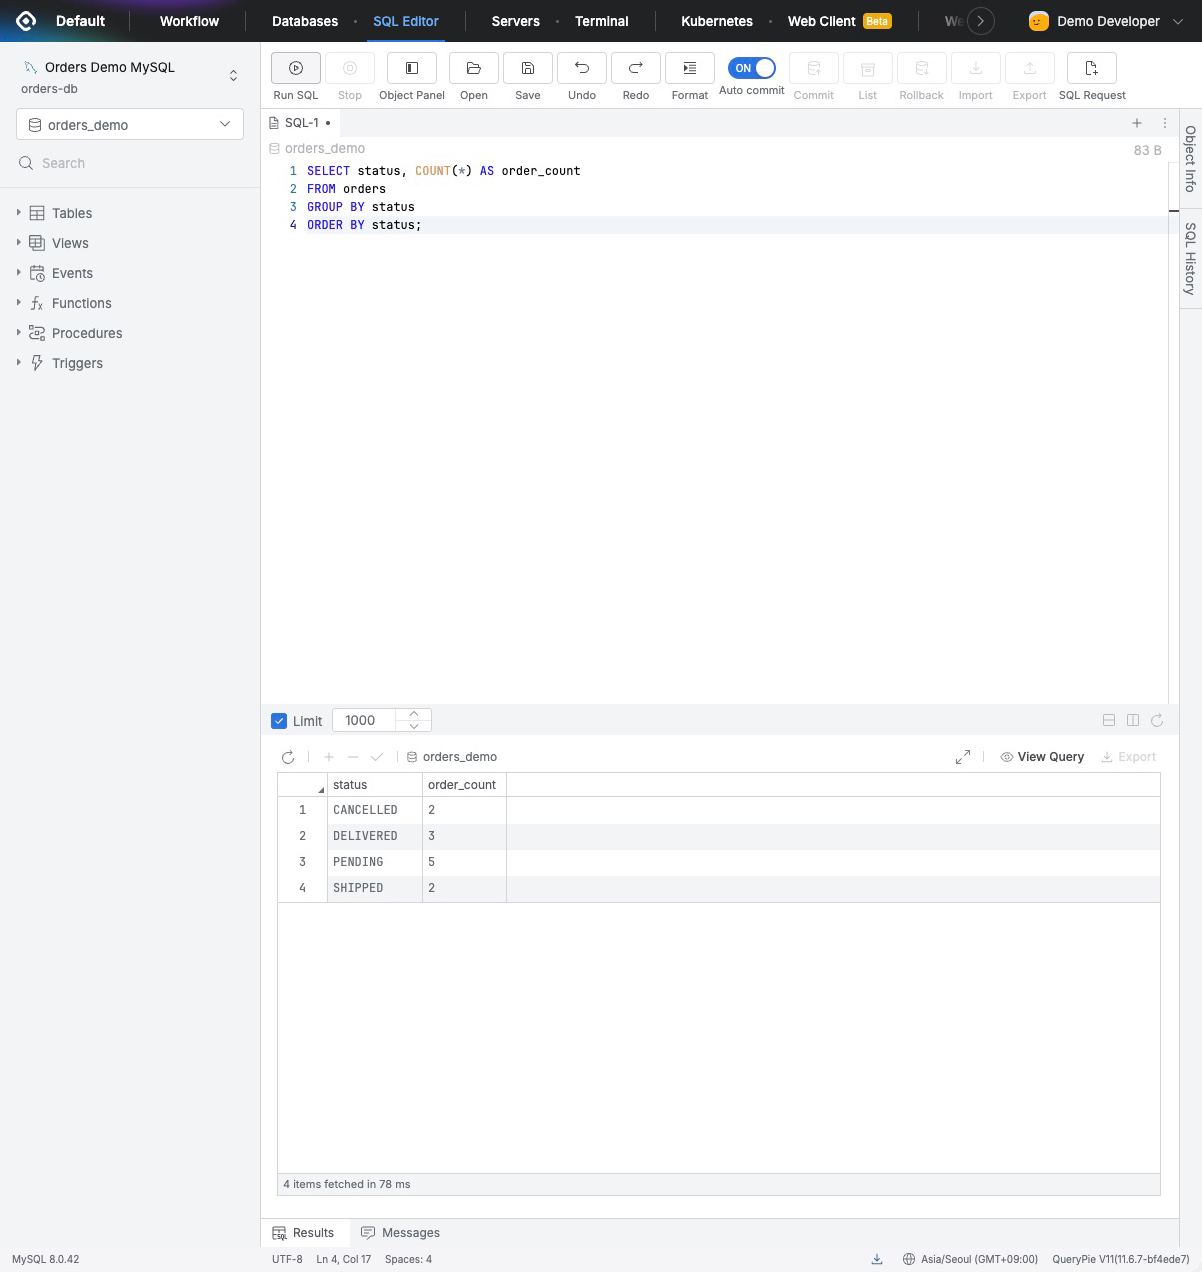
From the developer’s perspective, the steps were simply signing in to QueryPie, choosing a database, and running SQL. No separate MySQL account or password had to be shared.
Queries alone do not cover all work. Copying or exporting results and transaction-related permissions were unchecked for this account. A real team would need to enable and test the capabilities it requires.
5. Connecting with DBeaver Too
Next, I queried the same orders in DBeaver. Connecting through the QueryPie proxy allows SQL execution from an existing database client.
I used Agentless Proxy: the database client connects to QueryPie’s proxy without installing a separate agent.
Back in the administrator view, I enabled Proxy Usage in the database connection details, selected Use QueryPie registered account, and saved. QueryPie then connects to MySQL using the previously registered database account.
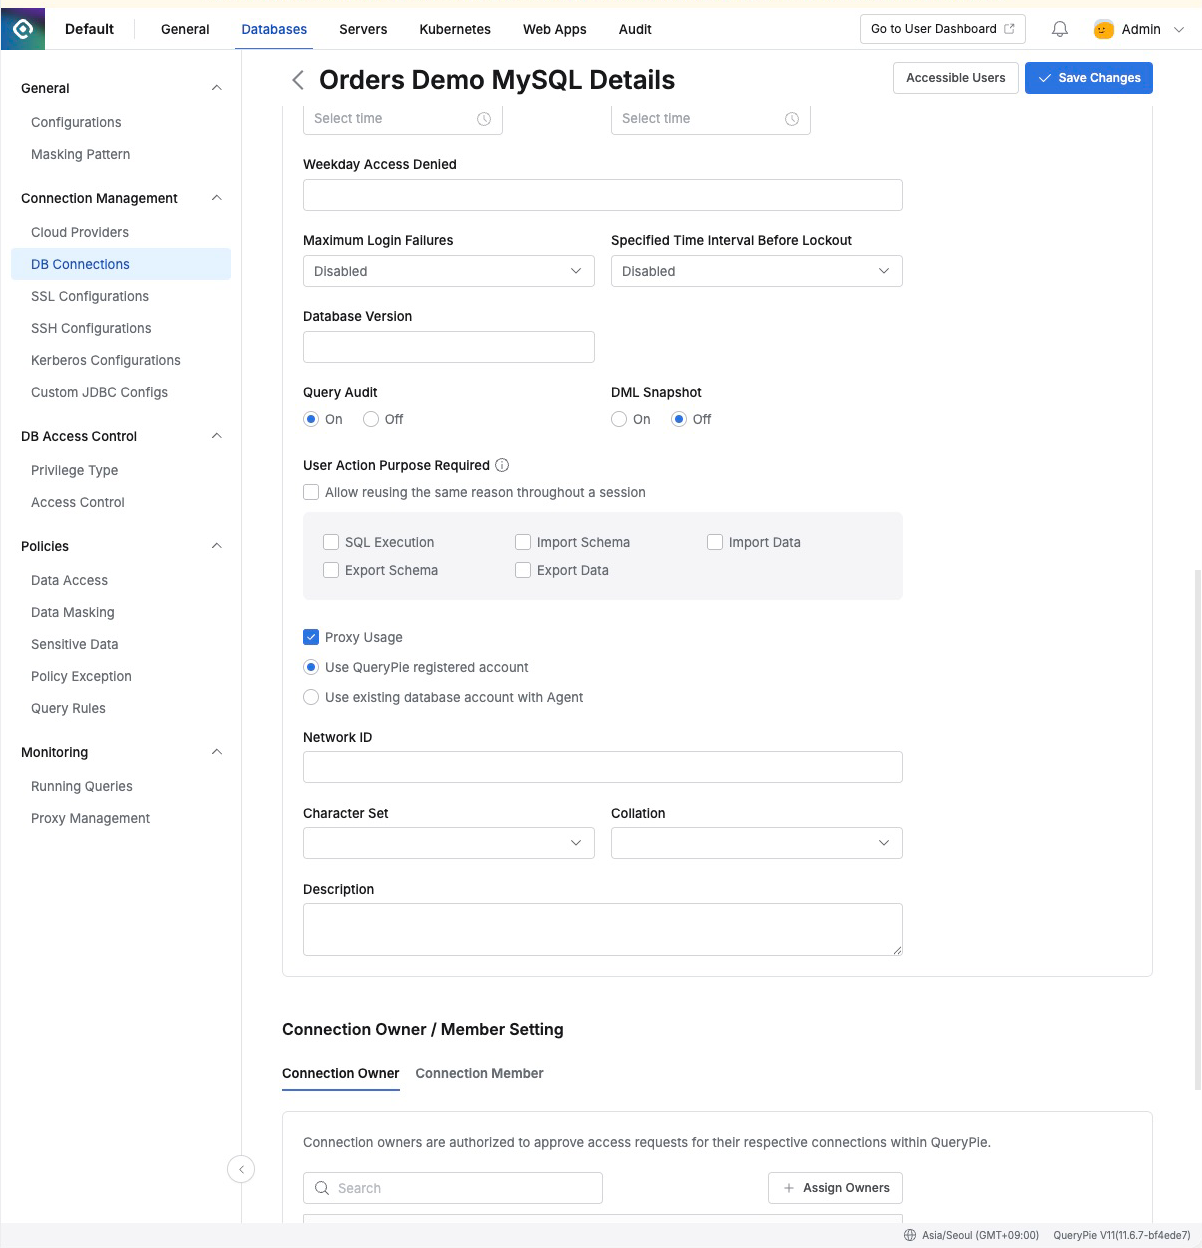
In the developer view, Proxy Info showed port 40000. I clicked Create Token to obtain a Username and Password for the connection. DBeaver uses this token instead of the original MySQL password.
The token is visible only when issued, so I stored it securely. If lost, it must be revoked and reissued. The capture below shows guidance without the token value.
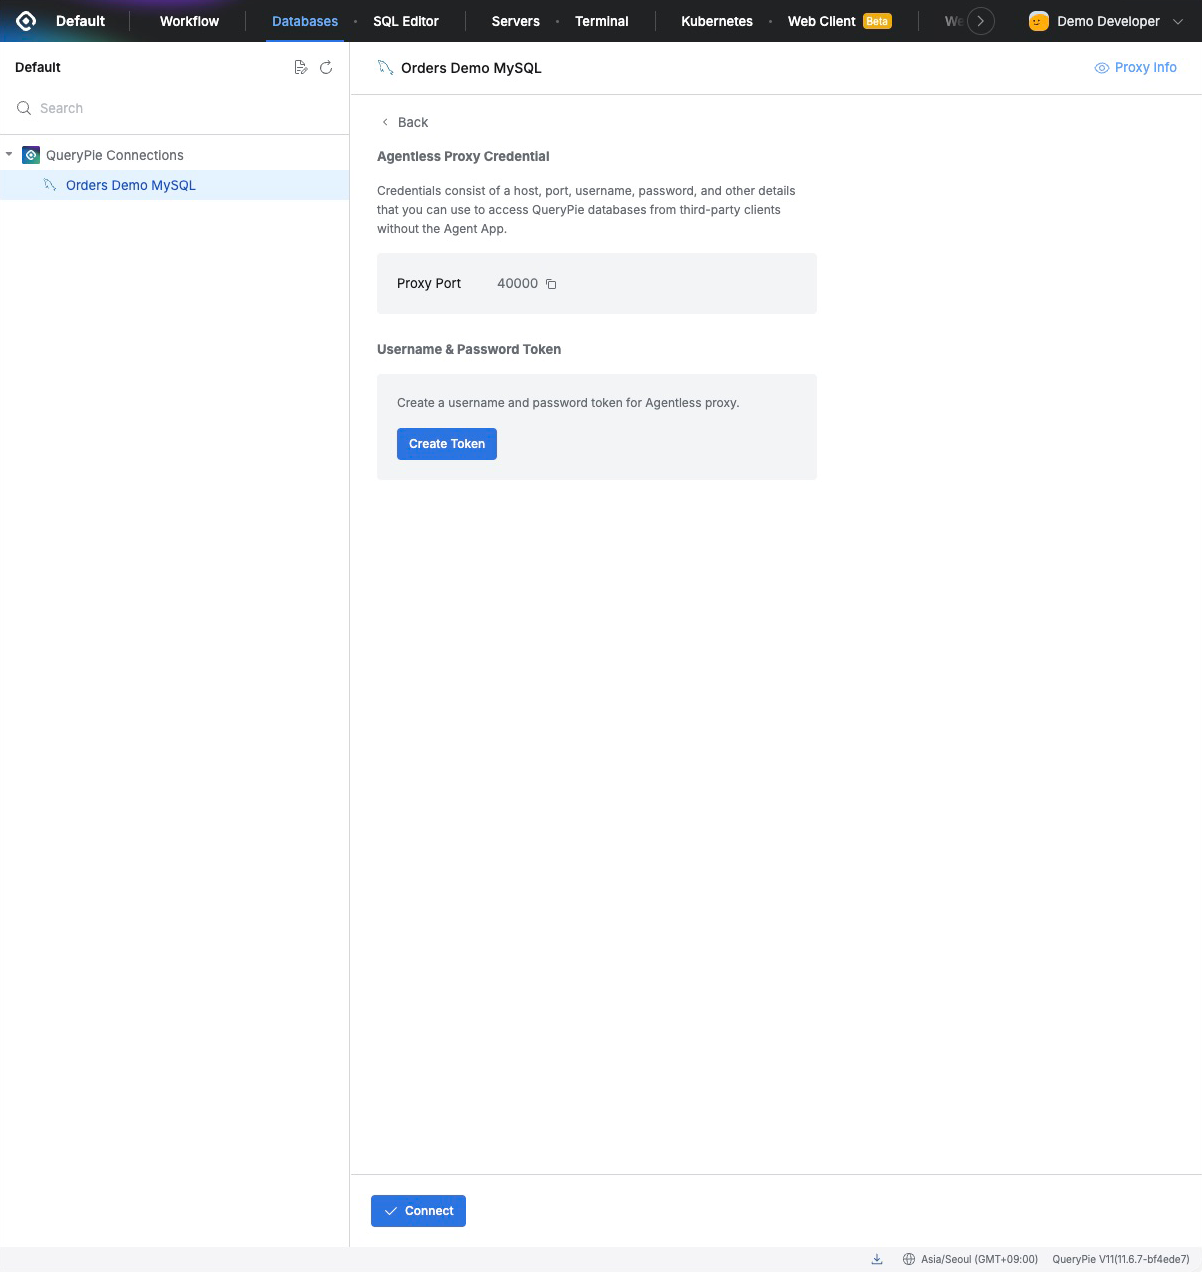
I opened DBeaver and created a new MySQL connection.
Host: 127.0.0.1
Port: 40000
Database: orders_demo
Username / Password: proxy token issued by the developer account
I used 127.0.0.1 because QueryPie and DBeaver run on the same Mac. For multiple employees, use a QueryPie proxy address reachable from their PCs and check that the firewall permits its port.
Test Connection reported MySQL 8.0.42. I then pasted the same pending-orders query used in the web editor.
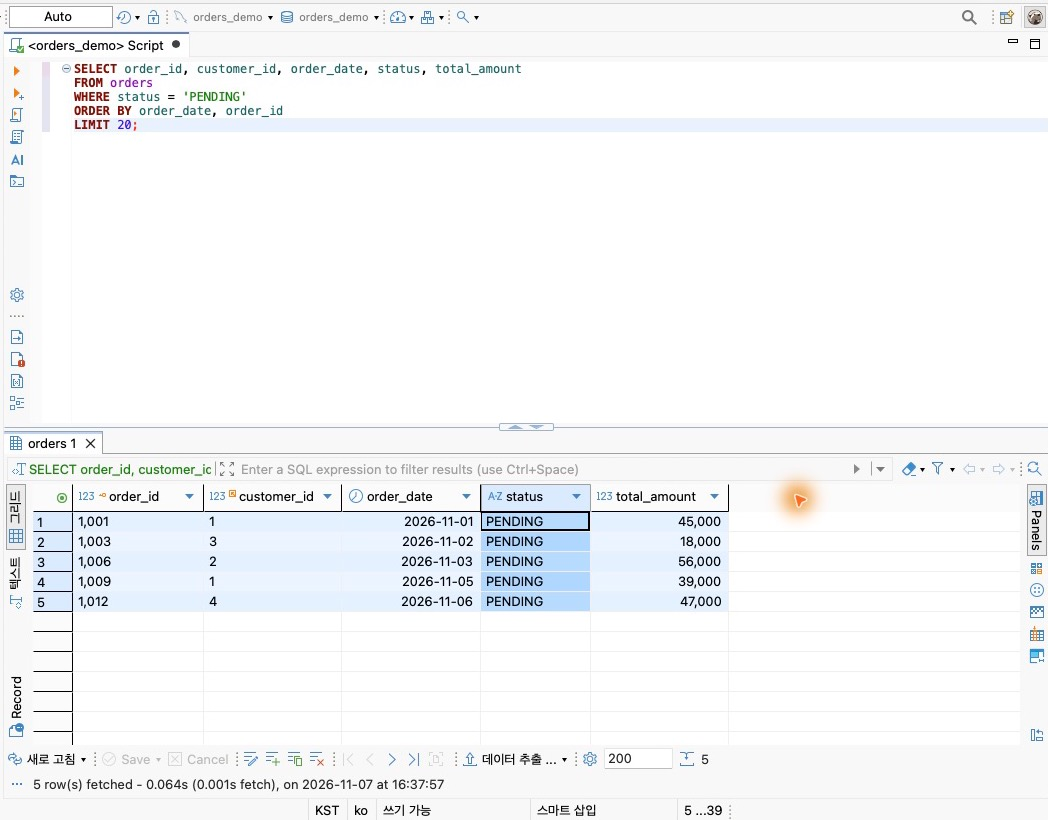
The SQL was identical in the browser and DBeaver. In DBeaver, only the address, port, and login details were configured for the QueryPie proxy. At least for this MySQL query, I could keep my existing database tool.
6. Connecting Through Multi Agent on My Computer
Besides entering connection details manually, an agent can be installed on the computer. I installed QueryPie Multi Agent and opened DBeaver from its database list.
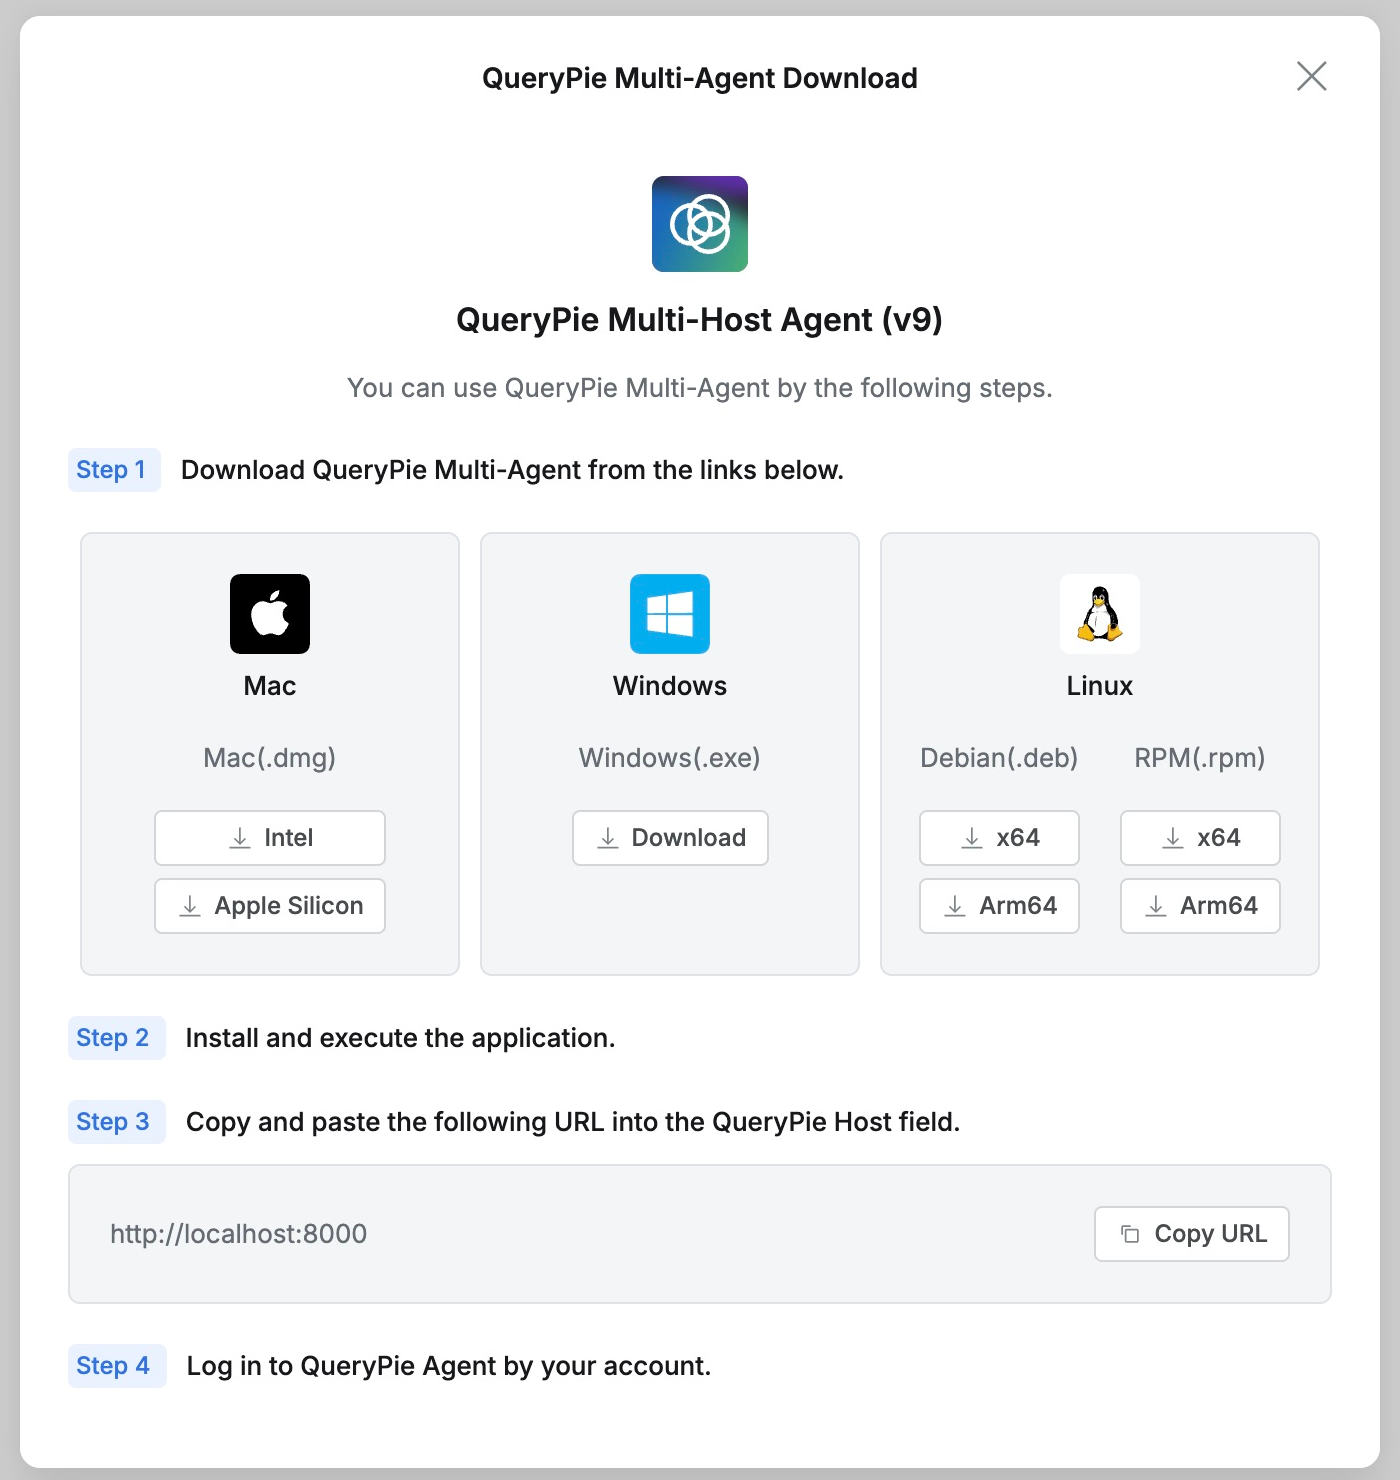
From the top-right QueryPie profile menu, I selected Download & Support → Multi-Agent. Installers for Mac, Windows, and Linux were available; I downloaded Apple Silicon for my Mac. The server provided agent version v9.
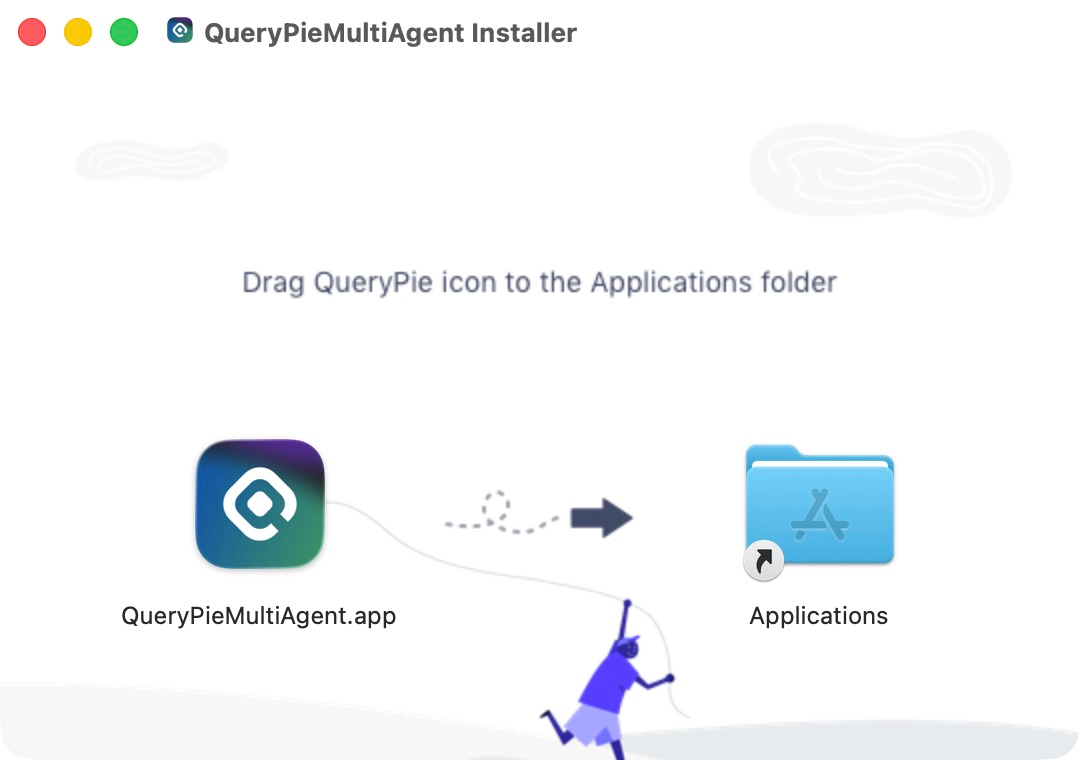
I opened the downloaded DMG and copied QueryPieMultiAgent into Applications.
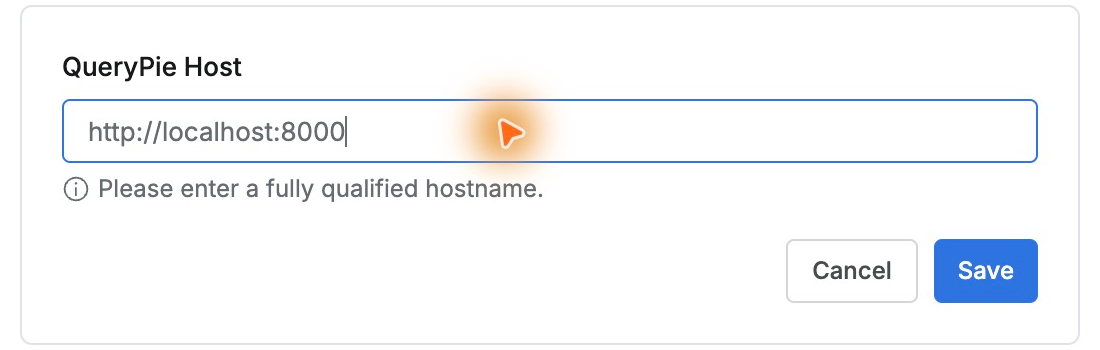
The agent needs the QueryPie web address, not the database address. I registered http://localhost:8000. If another host is already registered, Settings → Add New Host adds one. Multiple QueryPie hosts can be registered—hence Multi Agent.
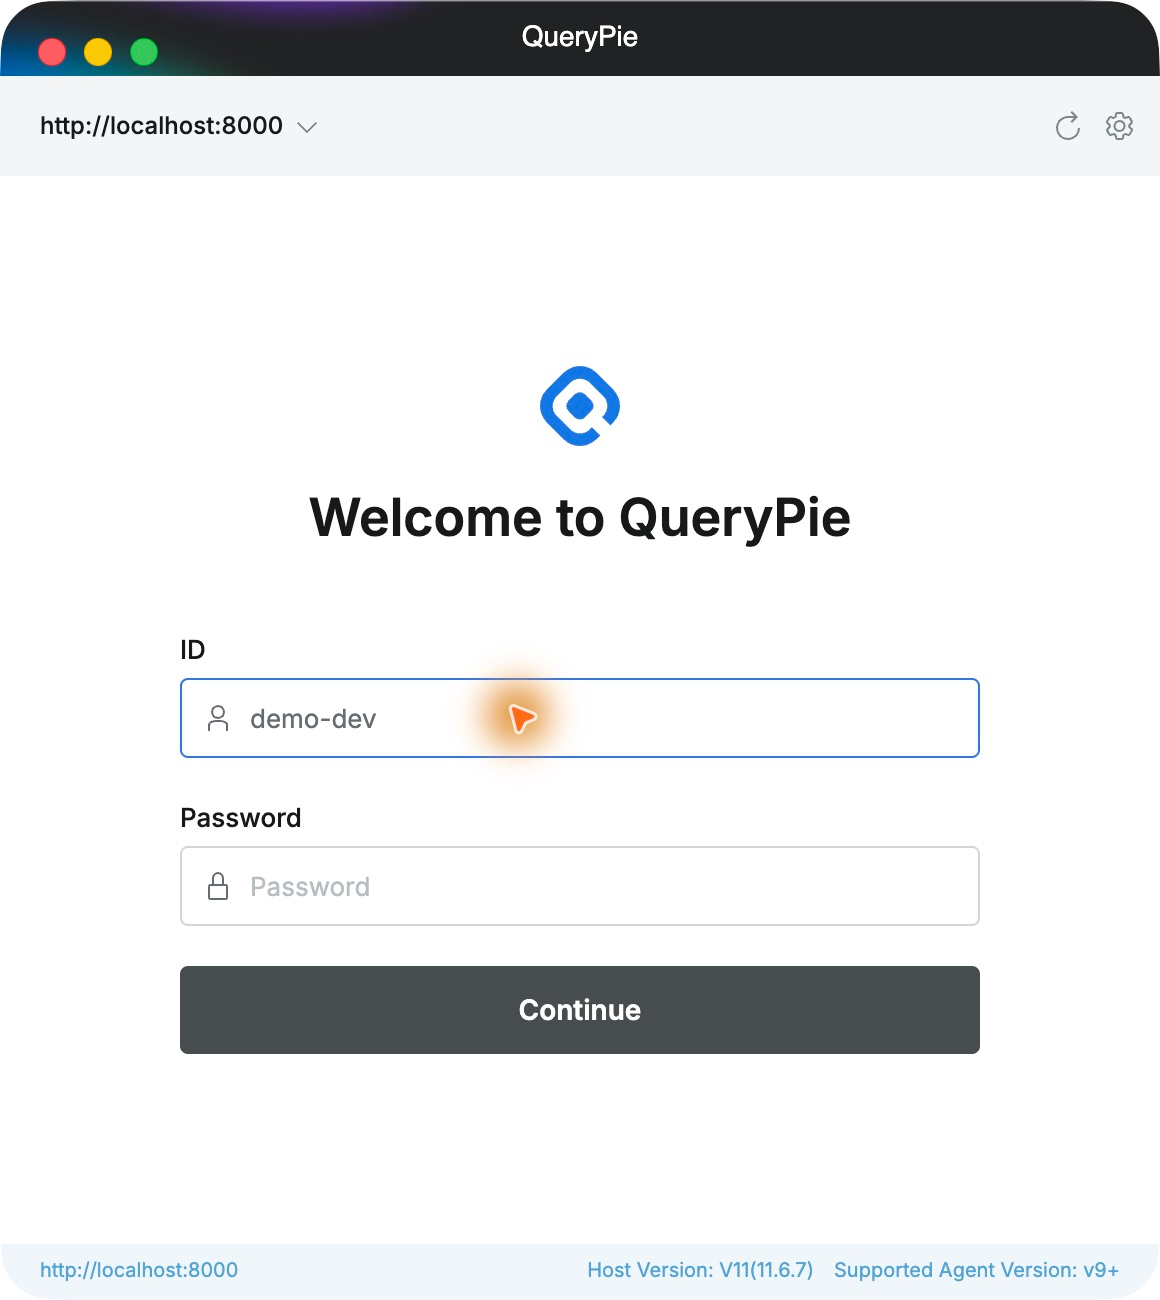
Selecting the server opened a login form. I signed in with demo-dev, the same developer account used on the web.
An administrator must first register the proxy address agents will use. Since QueryPie and the agent run on the same Mac, I registered 127.0.0.1 following the official initial-configuration guide. A company server needs an IP or domain reachable from employee PCs. This is administrator setup, not something each developer configures in a database.
Expanding QueryPie Connections under Databases showed Orders Demo MySQL, with orders-db and Read-Only (User) below it. The agent reflected the privileges granted in the web interface.
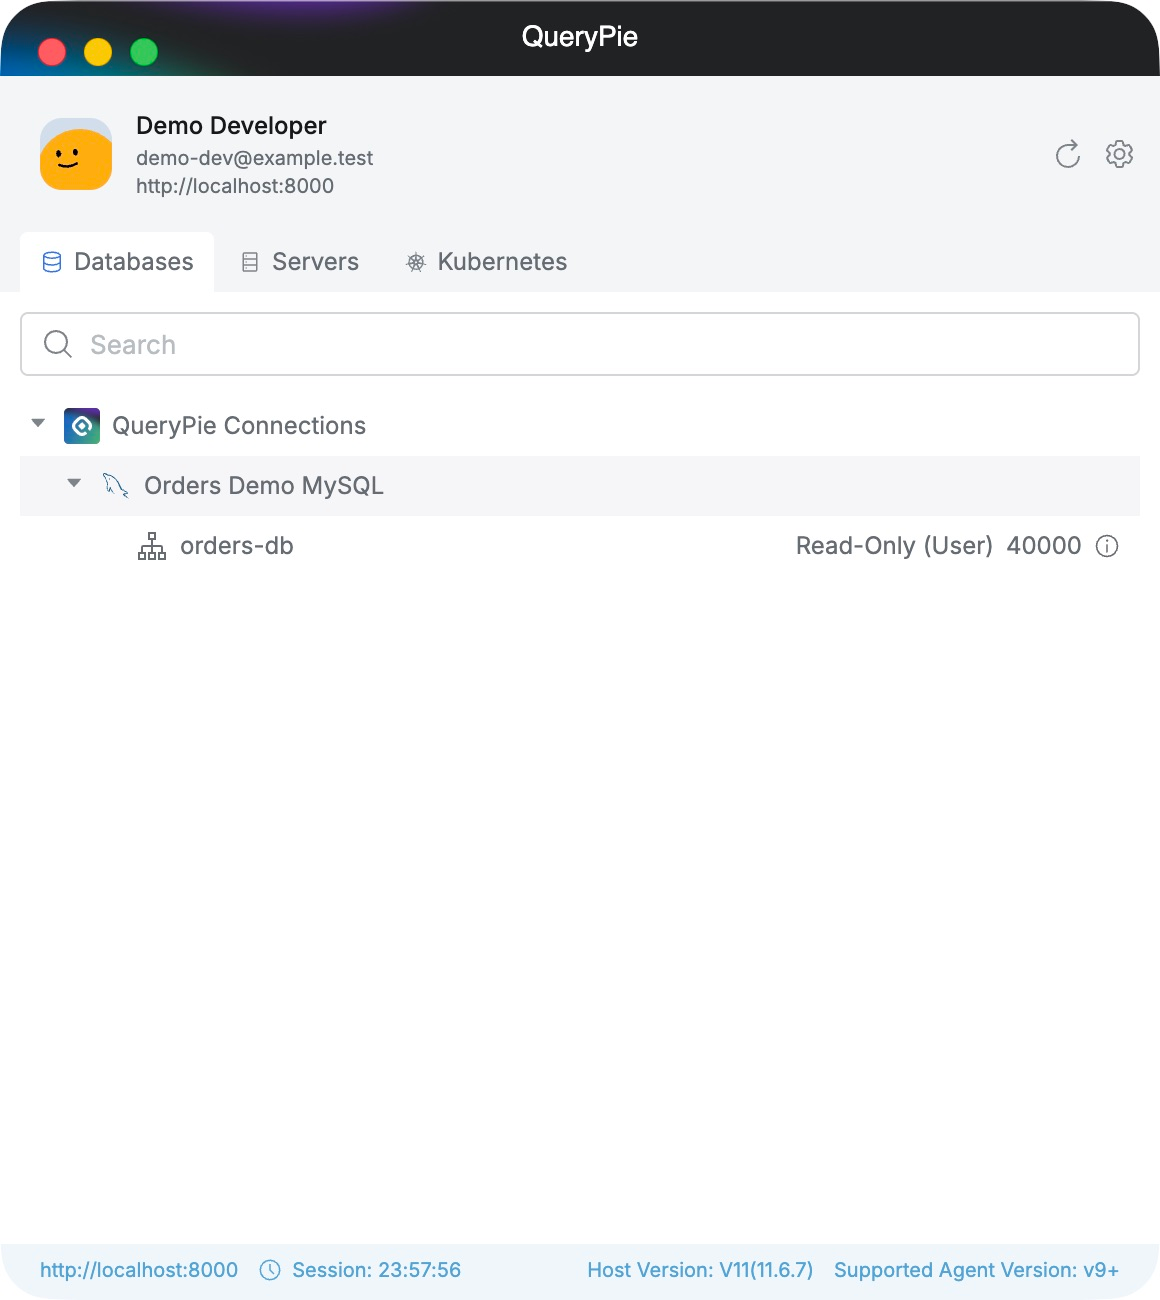
I right-clicked orders-db and selected Open Connection With → DBeaver. A connection named Orders Demo MySQL was added to DBeaver. There was no need to issue a web token and enter each connection setting manually.
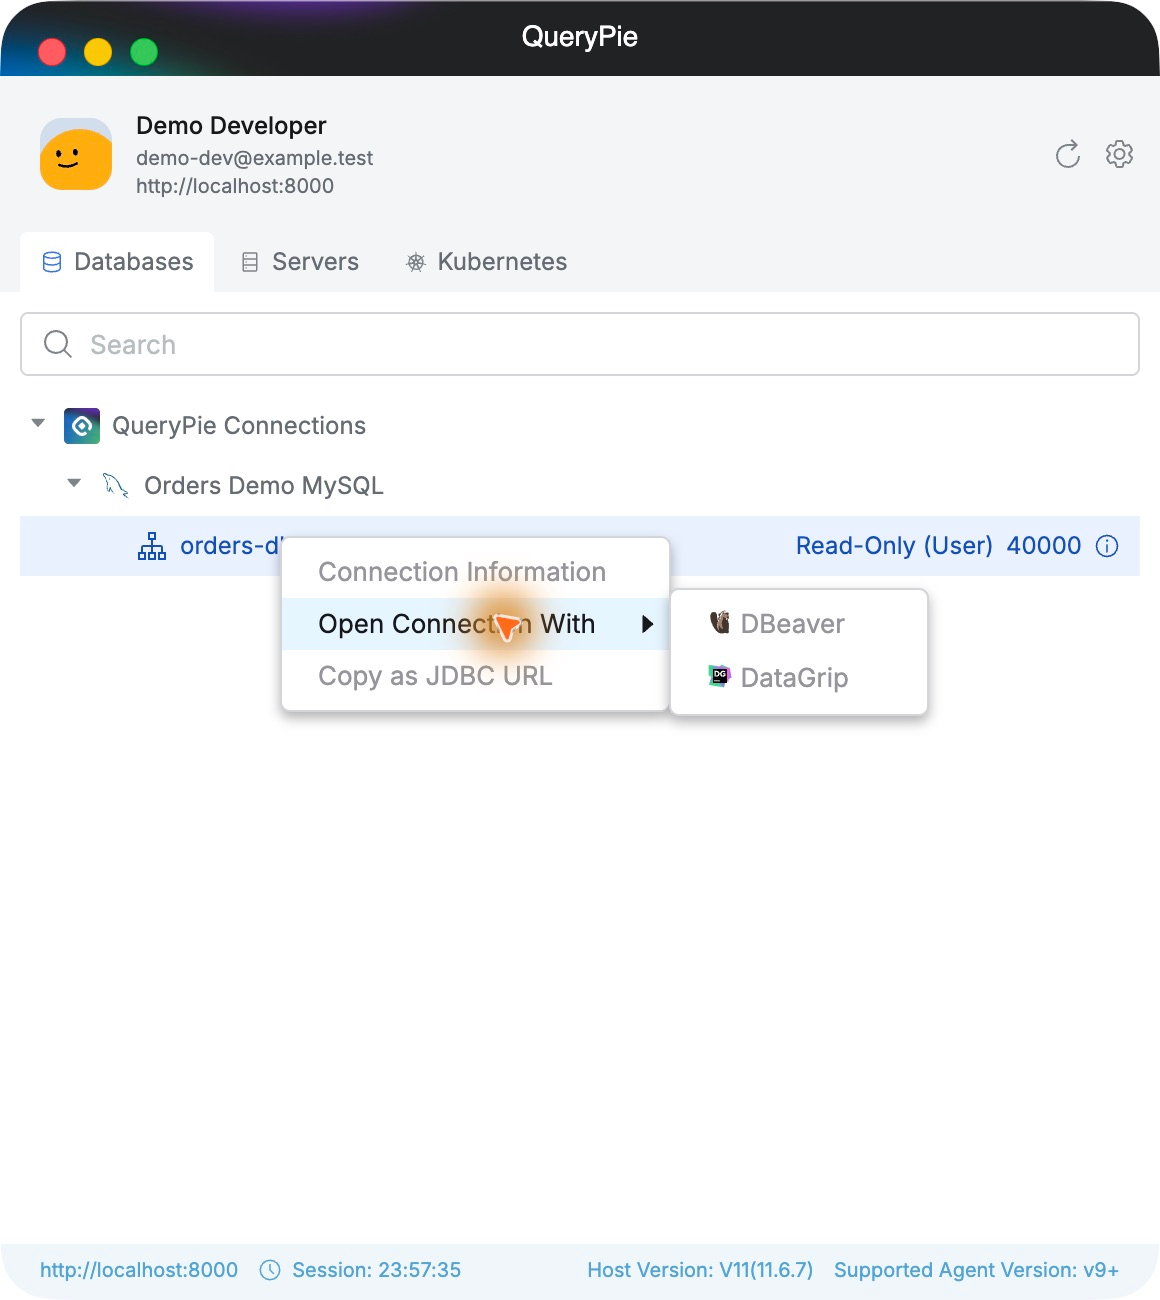
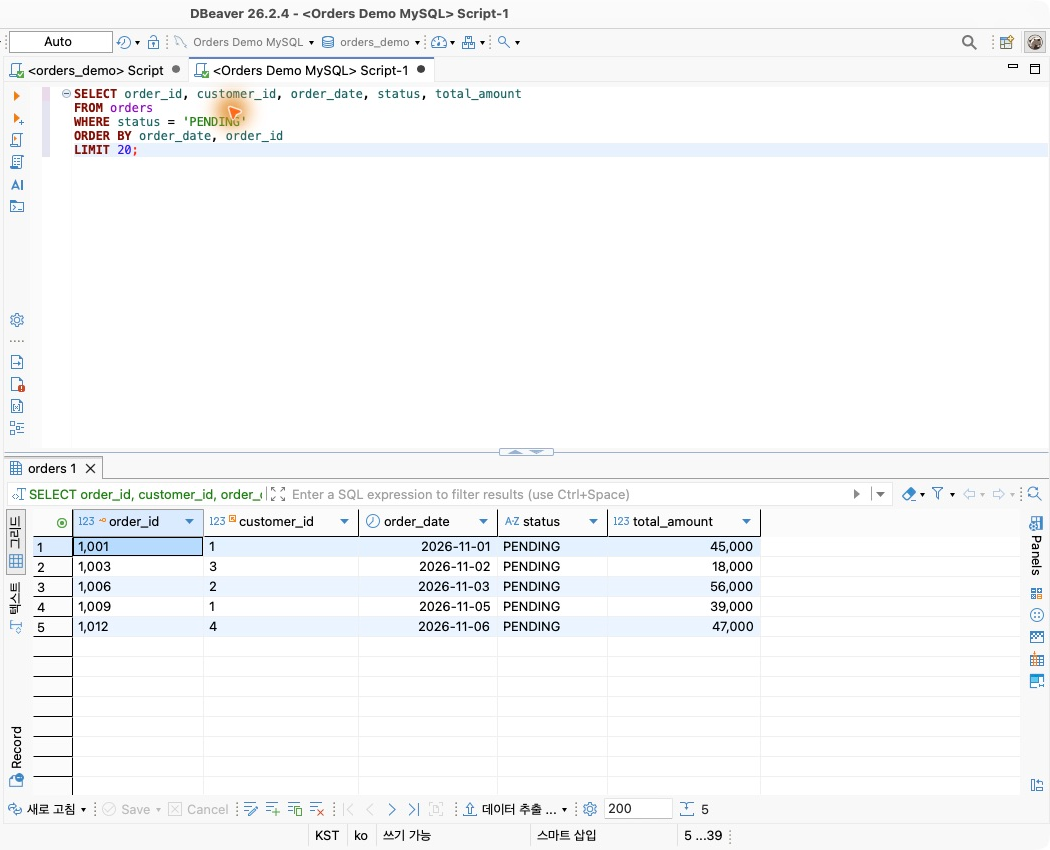
I opened the added connection and ran the same pending-orders query in a new SQL editor. Orders 1001, 1003, 1006, 1009, and 1012 appeared again.
The difference was in preparing the connection. Without the agent, I entered the token and settings manually. With Multi Agent, I signed in, selected a database, and opened DBeaver. Teams connecting to many databases daily may want to compare both approaches.
7. What Still Needs Checking Before Company Use
Connecting it myself made the adoption discussions—and who needs to be involved—more concrete.
First, decide who registers databases and grants privileges. I played both roles here; a company needs a defined approver for developer requests. The same applies to revoking privileges after transfers or departures.
Test the tools the team actually uses. I ran simple SELECTs with MySQL and DBeaver; DataGrip or other databases need their own tests. I have not yet checked large query volumes or transactions.
Security features cannot be verified from settings alone. Does Read-Only actually block modifications? What happens to an existing session after revocation? Query Audit was On, but I will inspect how users and SQL are logged in the next article.
8. Checking Direct Database Access Paths Too
This brought me back to Part 1’s idea of control after intrusion. Access through QueryPie worked. But what if a direct route to the original database remains?
That route remains in my lab. For comparison and checks, MySQL is directly reachable on the Mac at 127.0.0.1:13306. The QueryPie proxy port used in DBeaver is 40000.
A company rollout should address this too: restrict allowed connection sources and check who holds the original database credentials. Hiding credentials in the connection list does not block direct access by itself.
To keep access under QueryPie’s control even if database passwords or a developer PC are compromised, these connection paths need attention too.
Next: Trying Modification Queries
I registered the database, signed in as a developer, and queried orders from the web editor and DBeaver. In DBeaver, I tried both manual connection details and Multi Agent. Users could run SQL in a familiar tool while accessing the database with privileges granted in QueryPie.
Part 4 will go further: what message appears when a read-only account attempts a change, what happens after revocation, and where the records remain. Since the source database account also has only SELECT, I will distinguish which layer blocks the operation.
References: Enabling Database Proxy · Connecting through the proxy without an agent · Multi Agent user guide · Initial configuration after installation